Lighting Design for an Apartment: Building Scenes for Every Room
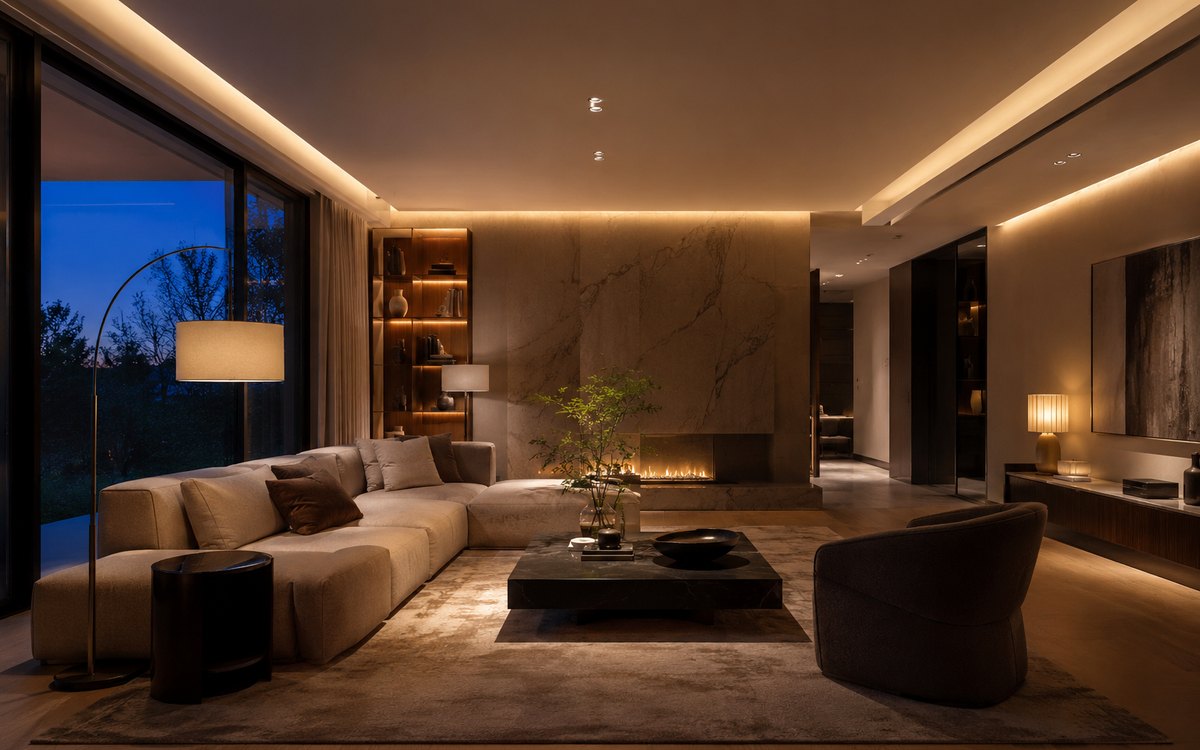
Lighting is the cheapest way to change how a home feels and the most common thing to get wrong. One fitting in the middle of the ceiling flattens a room no matter how good the finishes are. The alternative is not more light, it is layered light with scenes.
Why one pendant is never enough
A single overhead source lights the floor and leaves the walls and ceiling dark, which the eye reads as a smaller, lower room. It also casts every shadow downwards, which is unflattering for both people and furniture.
Several sources at different heights do the opposite: they create depth, and depth reads as space.
Three layers of light
General light fills the room. Task light serves a specific activity: reading, cooking, working, applying make-up. Accent light picks out a surface, a texture or an object.
A room needs at least two of the three. A living room usually needs all three, each on its own switch so the scenes can be changed independently.
Colour temperature and brightness
Warm light in living rooms and bedrooms, neutral in kitchens and bathrooms, and a consistent temperature within a single room. Mixing warm and cool fittings in one space is immediately noticeable and always looks accidental.
Brightness should be adjustable. Dimmers on the main circuits are inexpensive at the wiring stage and transform how a room works in the evening.
Typical scenes
Morning: bright, neutral, general light. Working: task light plus moderate general. Evening: warm accent light with the general layer dimmed low. Night: minimal low-level light for movement.
Four scenes cover almost every household. They require planning at the wiring stage, not extra fittings later.
Scenes room by room
Living room: general light, a floor lamp by the seating, accent light on a wall or shelving. Bedroom: soft general light, individual bedside lights, low-level light near the floor.
Kitchen: general plus continuous task lighting along the worktop. Bathroom: general plus light at the mirror from both sides. Hallway: general light plus a motion sensor.
Where to position the fittings
Not in a symmetrical grid across the ceiling. Position light where it is needed: above the worktop, beside the seating, along a wall you want to emphasise.
For downlights, keep them away from the middle of the room and closer to the walls: washing a surface with light makes the room feel larger than lighting empty floor.
Track lighting
Tracks solve two problems: they let you aim light precisely and they let you change the arrangement later without touching the ceiling. Slim recessed profiles keep the look calm.
They suit open-plan spaces and rooms where the furniture layout may change, which is most rented and most young households.
Controls
Dimmers, motion sensors in hallways and wardrobes, and separate switching for each layer. This is what turns a set of light fittings into scenes.
Smart control is convenient but has to be considered at the design stage: much of it lives in the wiring rather than in the fittings.
What to include in the drawings
Fitting positions, circuit grouping, switch locations, dimmer positions, cable routes and the mounting details for anything recessed. Add the furniture layout: lighting positions only make sense against it.
Mistakes you notice immediately
One ceiling fitting in the middle of the room. Cool light in a bedroom. Downlights placed around the perimeter with no purpose. Uplighting aimed straight into the eyes of a seated person.
Each of these makes an interior uncomfortable regardless of how much the finishes cost.
Common questions
How many light sources does a room need? Usually three or more, on at least two circuits.
Are dimmers worth the cost? They are one of the highest-value decisions in the whole electrical plan.
Can lighting be added after the renovation? Partly, with track systems and portable fittings. Anything recessed needs planning in advance.
Comments
No comments yet — be the first.